VNC
Virtual Network Computing (VNC) is a graphical desktop-sharing system that uses the Remote Frame Buffer protocol (RFB) to remotely control another computer. It transmits the keyboard and mouse events from one computer to another, relaying the graphical screen updates back in the other direction, over a network.
VNC-based connections are usually faster (require less network bandwidth) than X11 applications forwarded directly through SSH.
The recommended clients are TightVNC or TigerVNC (free, open source, available for almost any platform).
Create VNC Server Password
Note
VNC server password should be set before the first login. Use a strong password.
$ vncpasswd
Password:
Verify:
Start VNC Server
Note
To access VNC, a remote VNC Server must be started first and a tunnel using SSH port forwarding must be established.
See below the details on SSH tunnels.
Start by choosing your display number. To choose a free one, you should check currently occupied display numbers - list them using the command:
$ ps aux | grep Xvnc | sed -rn 's/(\s) .*Xvnc (\:[0-9]+) .*/\1 \2/p'
username :79
username :60
.....
As you can see above, displays ":79" and ":60" are already occupied. Generally, you can choose display number freely, except these occupied numbers. Also remember that display number should be lower than or equal to 99. Based on this requirement, we have chosen the display number 61, as seen in the examples below.
Note
Your situation may be different so the choice of your number may differ, as well. Choose and use your own display number accordingly!
Start your remote VNC server on the chosen display number (61):
$ vncserver :61 -geometry 1600x900 -depth 16

New 'login2:1 (username)' desktop is login2:1

Starting applications specified in /home/username/.vnc/xstartup
Log file is /home/username/.vnc/login2:1.log
Check whether the VNC server is running on the chosen display number (61):
$ vncserver -list

TigerVNC server sessions:

X DISPLAY #     PROCESS ID
:61              18437
Another way to check it:
$  ps aux | grep Xvnc | sed -rn 's/(\s) .*Xvnc (\:[0-9]+) .*/\1 \2/p'

username :61
username :102
Note
The VNC server runs on port 59xx, where xx is the display number. To get your port number, simply add 5900 + display number, in our example 5900 + 61 = 5961. Another example for display number 102 is calculation of TCP port 5900 + 102 = 6002, but note that TCP ports above 6000 are often used by X11. Calculate your own port number and use it instead of 5961 from examples below.
To access the remote VNC server you have to create a tunnel between the login node using TCP port 5961 and your local machine using a free TCP port (for simplicity the very same) in next step. See examples for Linux/Mac OS and Windows.
Note
The tunnel must point to the same login node where you launched the VNC server, e.g. login2. If you use just cluster-name.it4i.cz, the tunnel might point to a different node due to DNS round robin.
Linux/Mac OS Example of Creating a Tunnel
On your local machine, create the tunnel:
$ ssh -TN -f username@login2.cluster-name.it4i.cz -L 5961:localhost:5961
Issue the following command to check the tunnel is established (note the PID 2022 in the last column, it is required for closing the tunnel):
$ netstat -natp | grep 5961
(Not all processes could be identified, non-owned process info
 will not be shown, you would have to be root to see it all.)
tcp        0      0 127.0.0.1:5961          0.0.0.0:*               LISTEN      2022/ssh
tcp6       0      0 ::1:5961                :::*                    LISTEN      2022/ssh
Or on Mac OS use this command:
$ lsof -n -i4TCP:5961 | grep LISTEN
ssh 75890 sta545 7u IPv4 0xfb062b5c15a56a3b 0t0 TCP 127.0.0.1:5961 (LISTEN)
Connect with the VNC client:
$ vncviewer 127.0.0.1:5961
In this example, we connect to remote VNC server on port 5961, via the SSH tunnel. The connection is encrypted and secured. The VNC server listening on port 5961 provides screen of 1600x900 pixels.
You have to close the SSH tunnel which is still running in the background after you finish the work. Use the following command (PID 2022 in this case, see the netstat command above):
kill 2022
Note
You can watch the instruction video on how to make a VNC connection between a local Ubuntu desktop and the IT4I cluster here.
Windows Example of Creating a Tunnel
Start the VNC server using the vncserver command described above.
Search for the localhost and port number (in this case 127.0.0.1:5961):
$ netstat -tanp | grep Xvnc
(Not all processes could be identified, non-owned process info
 will not be shown, you would have to be root to see it all.)
tcp        0      0 127.0.0.1:5961              0.0.0.0:*                   LISTEN      24031/Xvnc
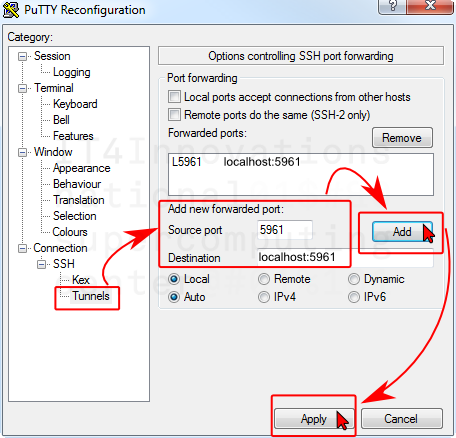
PuTTY
On the PuTTY Configuration screen, go to Connection -> SSH -> Tunnels to set up the tunnel.
Fill the Source port and Destination fields. Do not forget to click the Add button.
WSL (Bash on Windows)
Windows Subsystem for Linux is another way to run Linux software in a Windows environment.
At your machine, create the tunnel:
$ ssh username@login2.cluster-name.it4i.cz -L 5961:localhost:5961
Example of Starting VNC Client
Run the VNC client of your choice, select the VNC server 127.0.0.1, port 5961 and connect using the VNC password.
TigerVNC Viewer
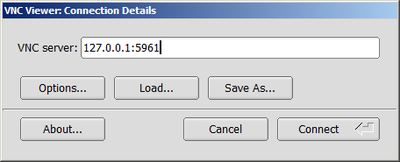
In this example, we connect to remote the VNC server on port 5961, via the SSH tunnel, using the TigerVNC viewer. The connection is encrypted and secured. The VNC server listening on port 5961 provides a screen of 1600x900 pixels.
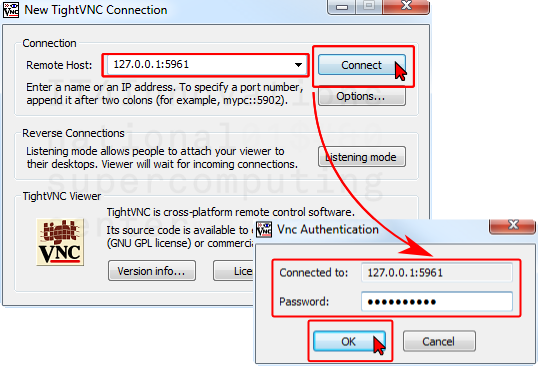
TightVNC Viewer
Use your VNC password to log using the TightVNC Viewer and start a Gnome Session on the login node.
Gnome Session
After the successful login, you should see the following screen:

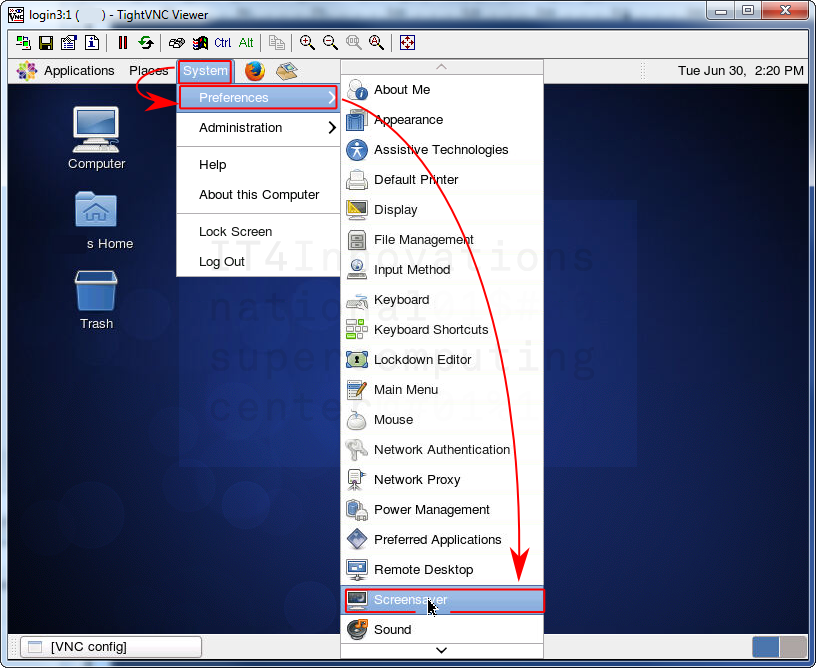
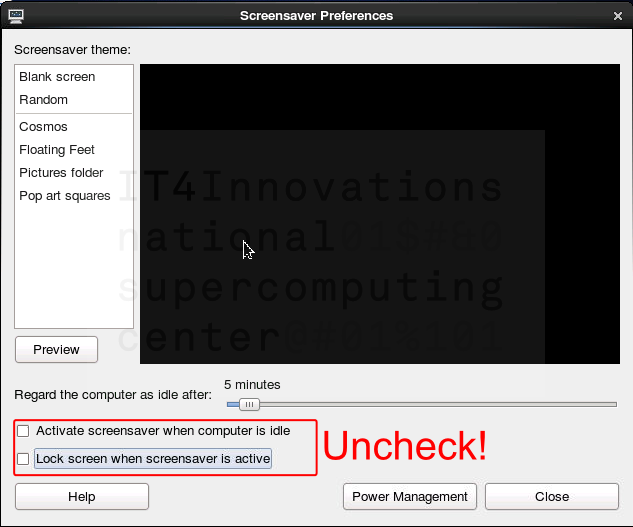
Disable Your Gnome Session Screensaver
Open the Screensaver preferences dialog:
Uncheck both options below the slider:
Kill Screensaver if Locked Screen
If the screen gets locked, you have to kill the screensaver. Do not forget to disable the screensaver then.
$ ps aux | grep screen
username     1503 0.0 0.0 103244   892 pts/4    S+   14:37   0:00 grep screen
username     24316 0.0 0.0 270564 3528 ?        Ss   14:12   0:00 gnome-screensaver

[username@login2 .vnc]$ kill 24316
Kill VNC Server After Finished Work
You should kill your VNC server using the command:
$ vncserver -kill :61
Killing Xvnc process ID 7074
Xvnc process ID 7074 already killed
or:
$ pkill vnc
Note
Also, do not forget to terminate the SSH tunnel, if it was used. For details, see the end of this section.
GUI Applications on Compute Nodes Over VNC
The very same methods as described above may be used to run the GUI applications on compute nodes. However, for maximum performance, follow these steps:
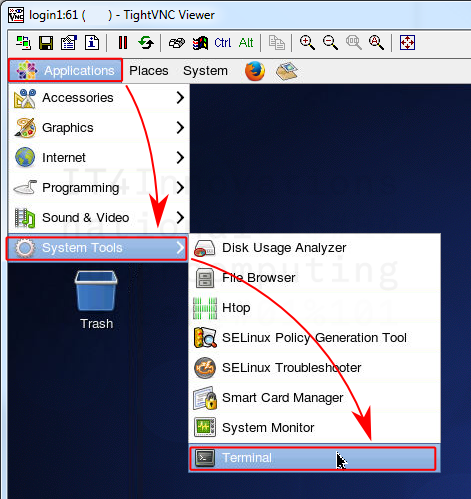
Open a Terminal (Applications -> System Tools -> Terminal). Run all the following commands in the terminal.
Allow incoming X11 graphics from the compute nodes at the login node:
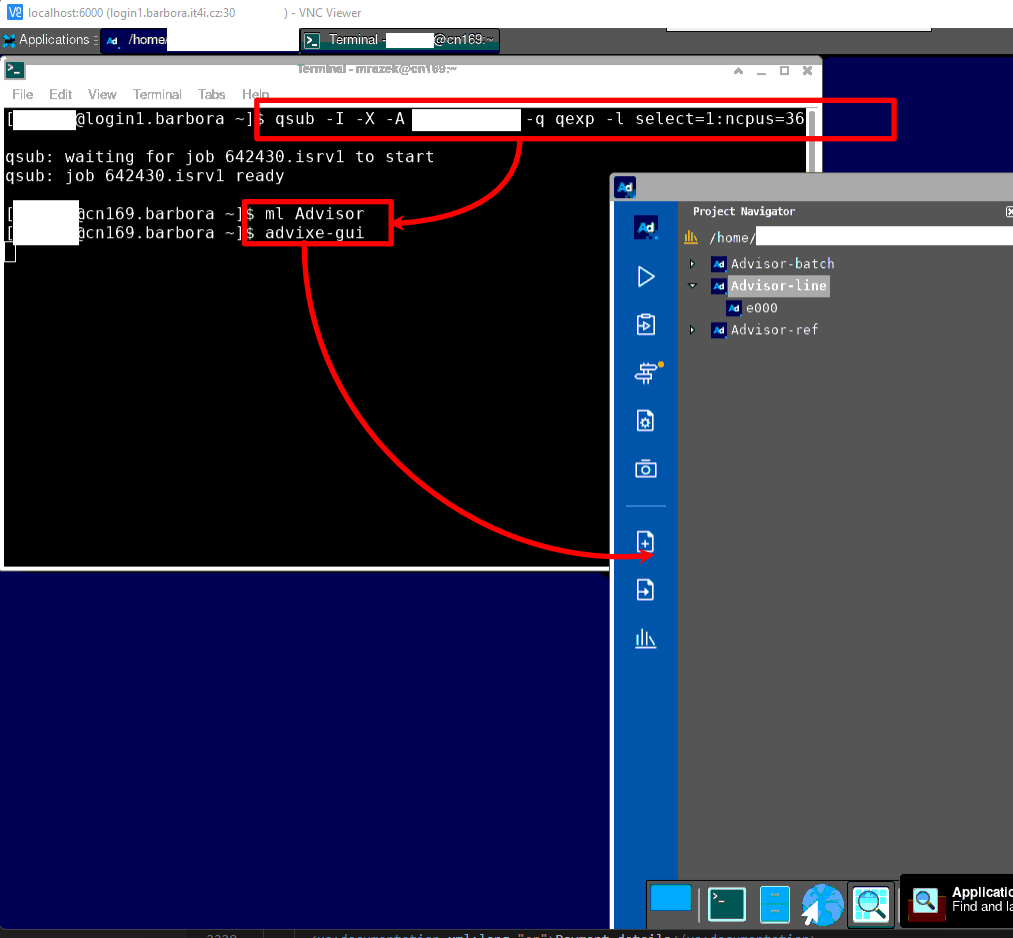
Get an interactive session on a compute node (for more detailed info look here). Forward X11 system using --x11 option:
$ salloc -A PROJECT_ID -p qcpu --x11
Test that the DISPLAY redirection into your VNC session works, by running an X11 application (e.g. XTerm, Intel Advisor, etc.) on the assigned compute node:
$ xterm
The example described above:
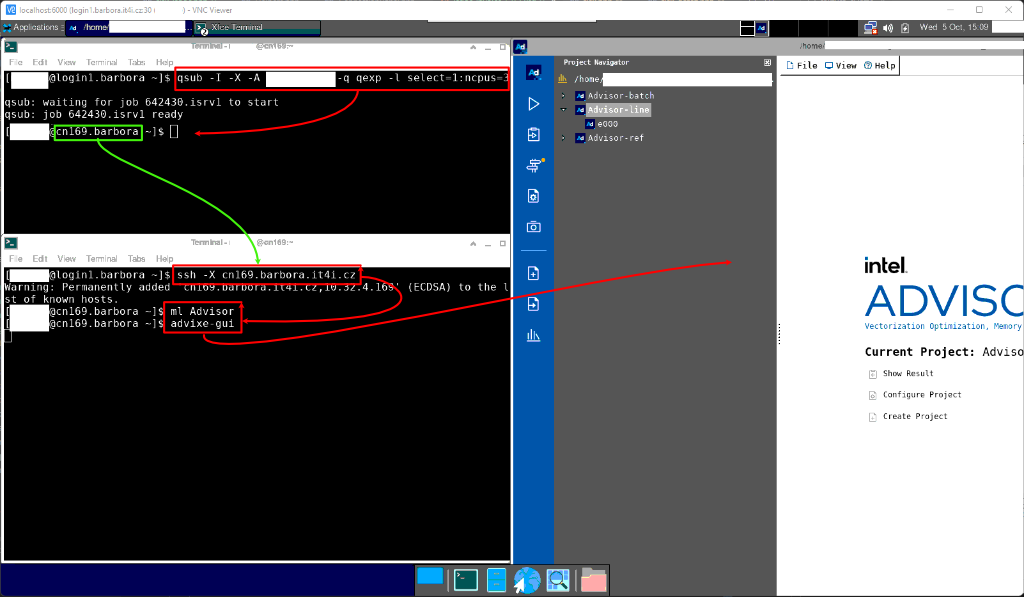
GUI Over VNC and SSH
For a better performance an SSH connection can be used.
Open two Terminals (Applications -> System Tools -> Terminal) as described before.
Get an interactive session on a compute node (for more detailed info look here). Forward X11 system using --x11 option:
$ salloc -A PROJECT_ID -p qcpu --x11
In the second terminal connect to the assigned node and run the X11 application
$ ssh -X node_name.barbora.it4i.cz
$ xterm
The example described above: