What Is DICE Project?
DICE (Data Infrastructure Capacity for EOSC) is an international project funded by the European Union that provides cutting-edge data management services and a significant amount of storage resources for the EOSC. The EOSC (European Open Science Cloud) project provides European researchers, innovators, companies, and citizens with a federated and open multi-disciplinary environment where they can publish, find, and re-use data, tools, and services for research, innovation and educational purposes.
For more information, see the official DICE project and EOSC project pages.
IT4Innovations participates in DICE. DICE uses the iRODS software
The integrated Rule-Oriented Data System (iRODS) is an open source data management software used by research organizations and government agencies worldwide. iRODS is released as a production-level distribution aimed at deployment in mission critical environments. It virtualizes data storage resources, so users can take control of their data, regardless of where and on what device the data is stored. As data volumes grow and data services become more complex, iRODS is serving an increasingly important role in data management. For more information, see the official iRODS page.
How to Put Your Data to Our Server
Prerequisities:
First, we need to verify your identity, this is done through the following steps:
-
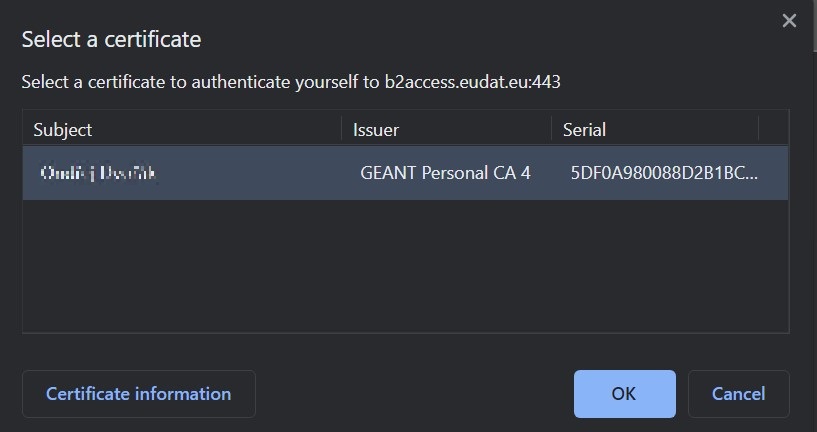
Sign in with your organization B2ACCESS; the page requests a valid personal certificate (e.g. GEANT). Accounts with "Low" level of assurance are not granted access to IT4I zone.
-
Confirm your certificate in the browser:
-
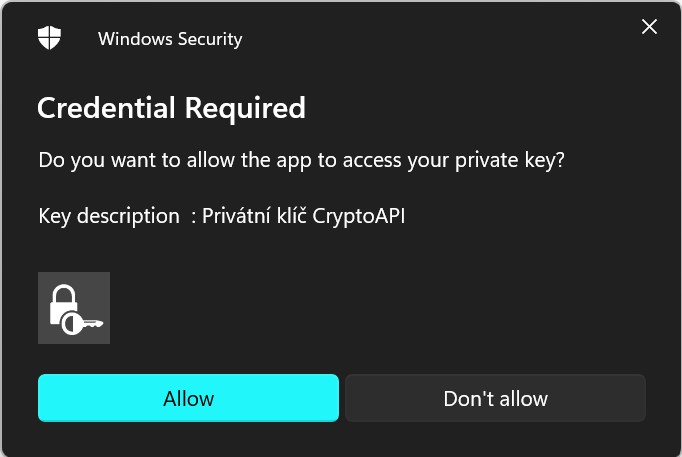
Confirm your certificate in the OS (Windows):
-
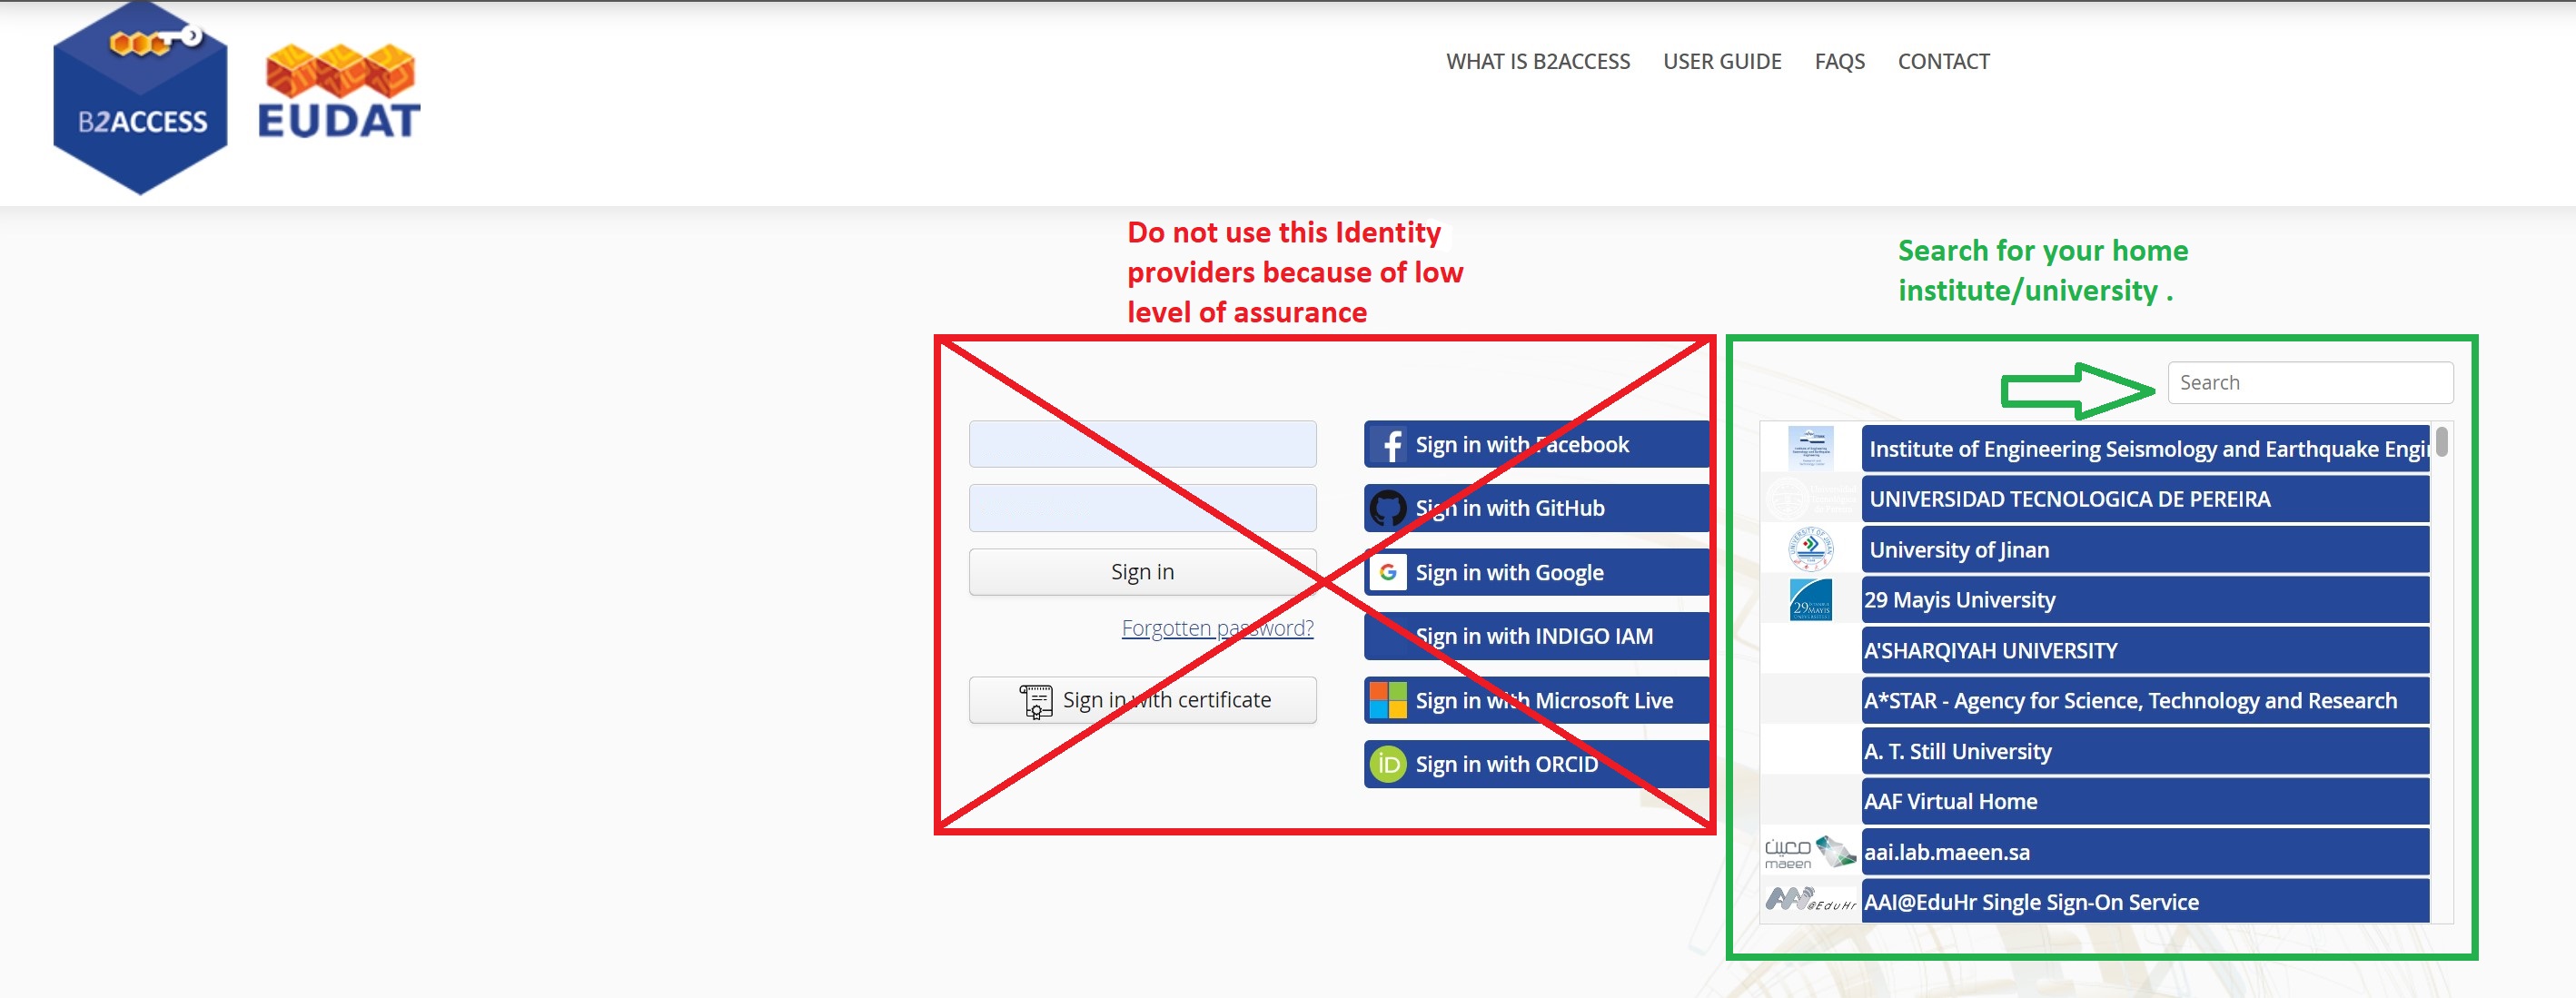
Sign to EUDAT/B2ACCESS:
-
After successful login to B2Access:
-
For Non IT4I Users
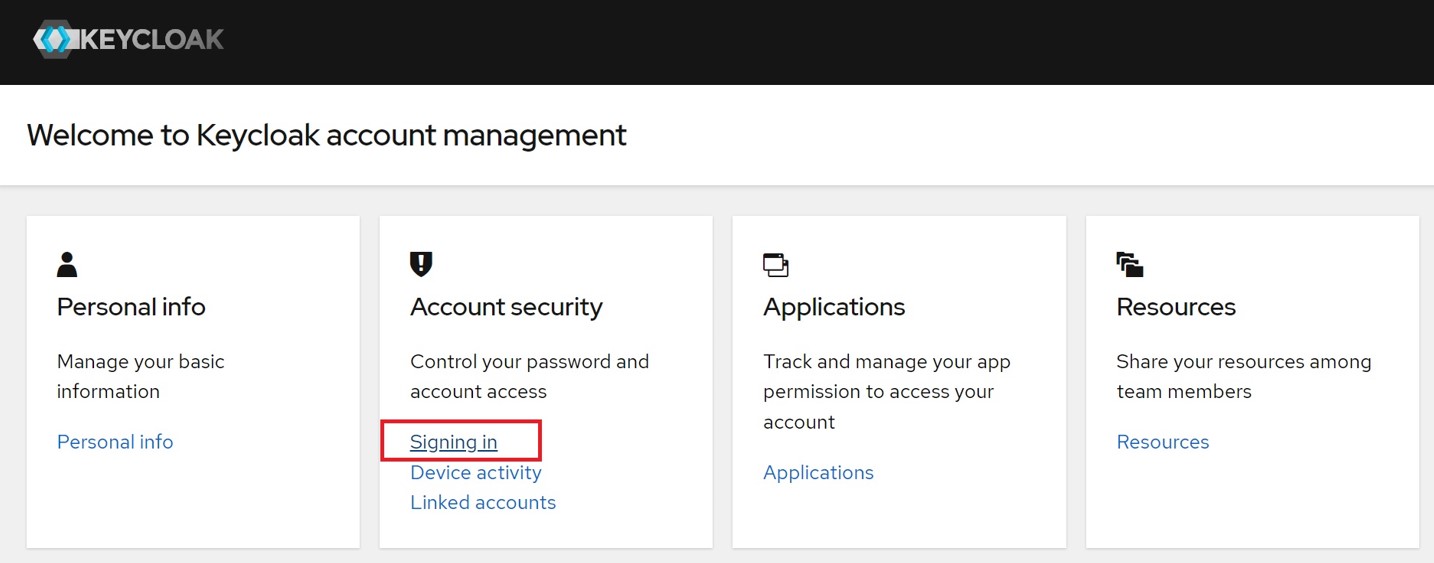
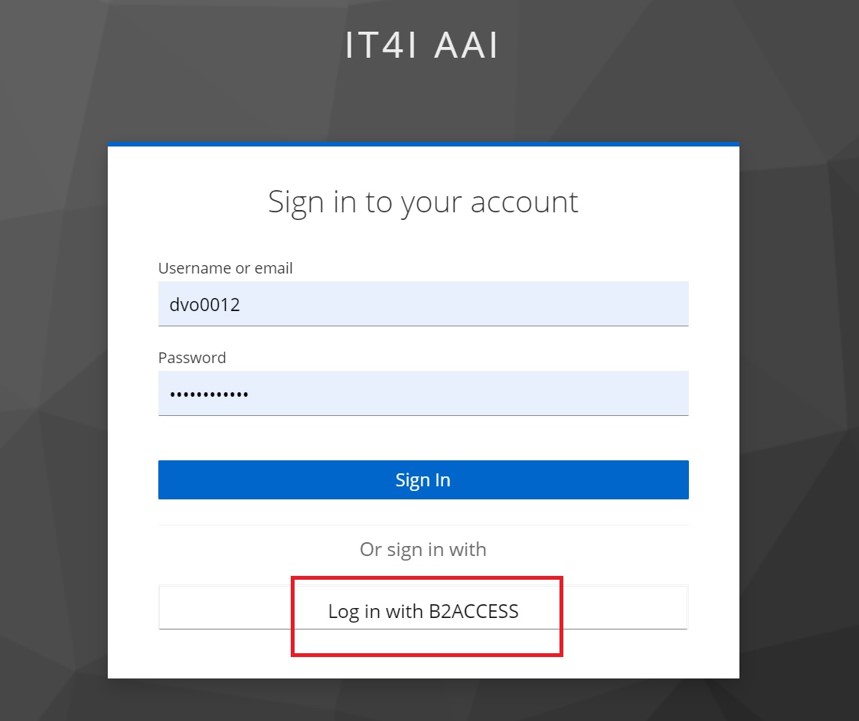
Sign in to our AAI through your B2Access account. You have to set a new password for iRODS access.
-
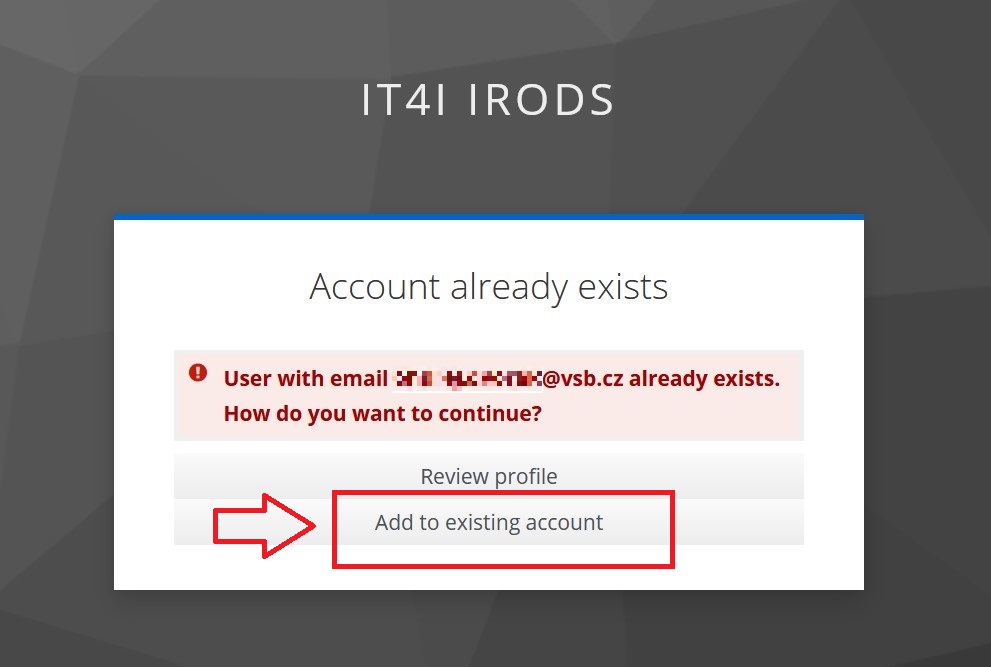
For IT4I Users
Sign in to our AAI through your B2Access account and link your B2ACCESS identity with your existing account. The iRODS password will be the same as your IT4I LDAP password (i.e. code.it4i.cz password).
-
-
Contact support@it4i.cz, so we can create your account at our iRODS server.
-
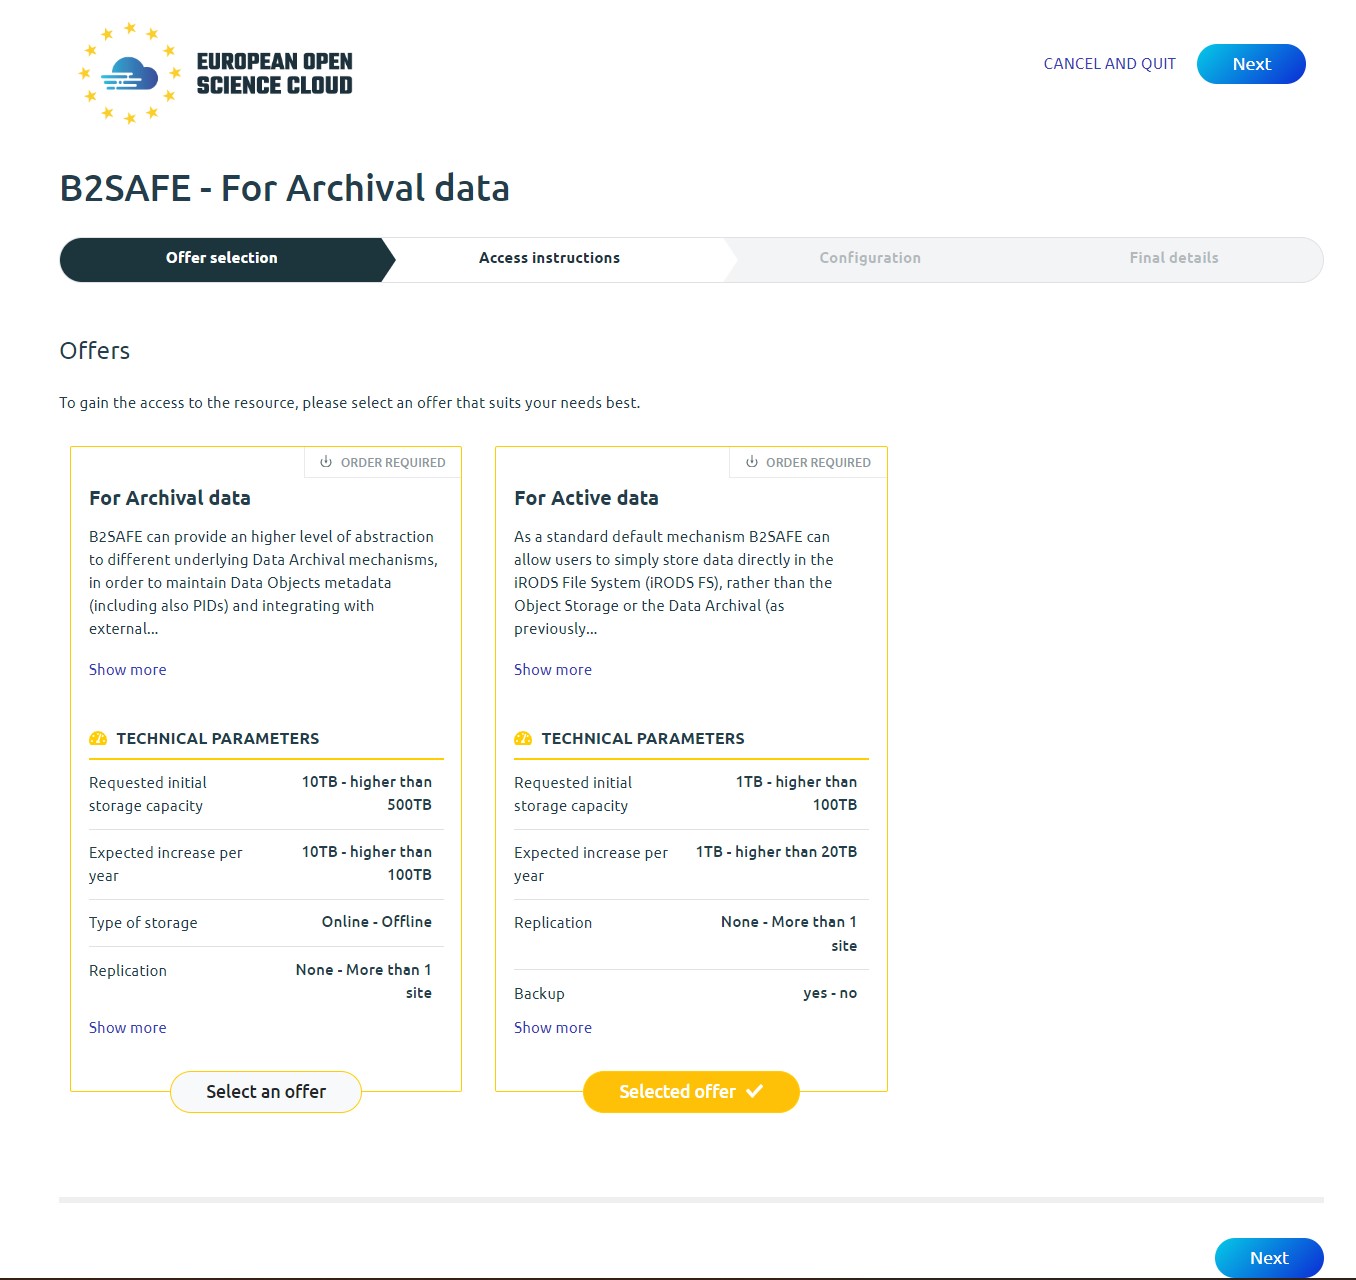
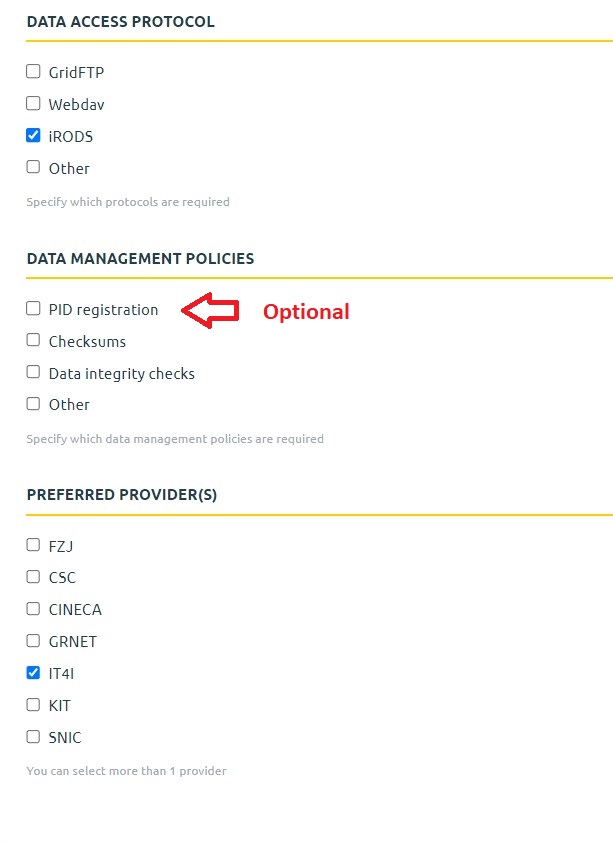
Fill this request on EOSC-MARKETPLACE (recommended) or at EUDAT, please specify the requested capacity.

Access to iRODS Collection From Karolina
Access to iRODS Collection requires access to the Karolina cluster (i.e. IT4I account),
since iRODS clients are provided as a module on Karolina (Barbora is in progress).
The irodsfs module loads config file for irodsfs and icommands, too.
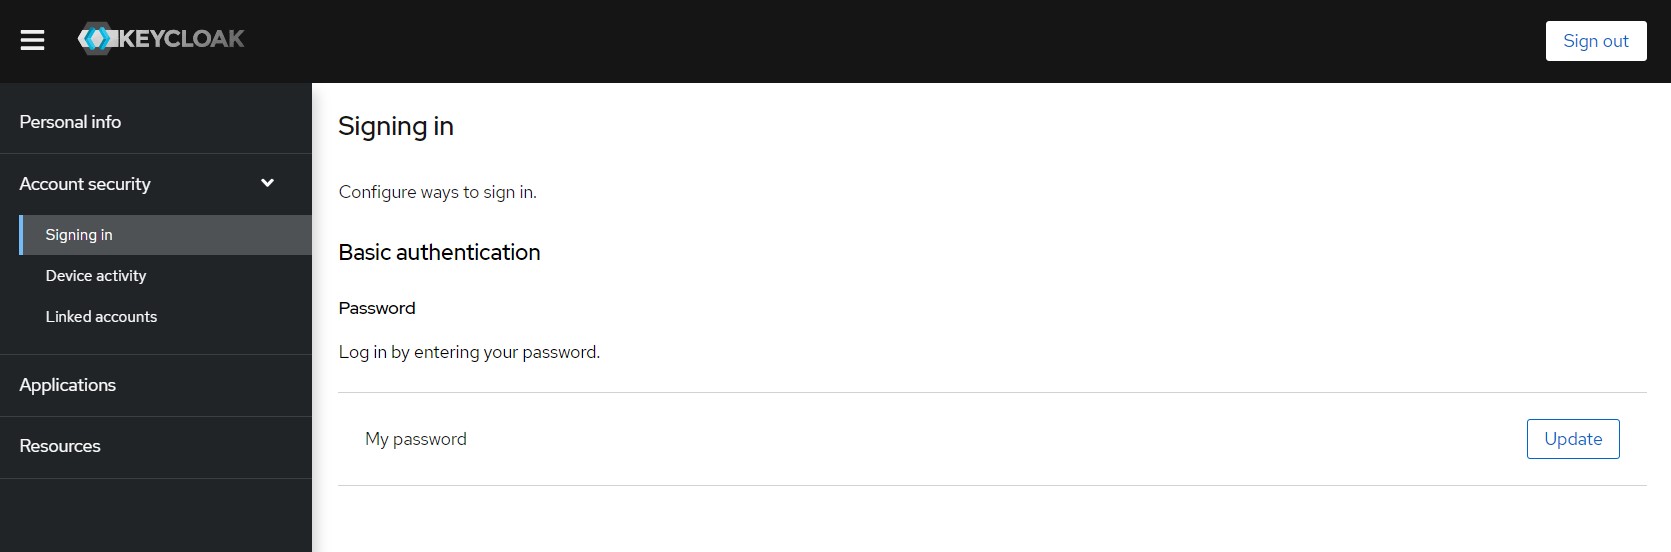
Note that you can change password to iRODS at aai.it4i.cz.
Mounting Your Collection
ssh some_user@karolina.it4i.cz
ml irodsfs
Now you can choose between the Fuse client or iCommands:
Fuse
ssh some_user@karolina.it4i.cz
[some_use@login4.karolina ~]$ ml irodsfs

irodsfs configuration file has been created at /home/dvo0012/.irods/config.yml
iRODS environment file has been created at /home/dvo0012/.irods/irods_environment.json

to start irodsfs, run:          irodsfs -config ~/.irods/config.yml ~/IRODS
to start iCommands, run:        iinit

For more information, see https://docs.it4i.cz/dice/
To mount your iRODS collection to ~/IRODS, run
[some_user@login4.karolina ~]$ irodsfs -config ~/.irods/config.yml ~/IRODS
time="2022-08-04 08:54:13.222836" level=info msg="Logging to /tmp/irodsfs_cblmq5ab1lsaj31vrv20.log" function=processArguments package=main
Password:
time="2022-08-04 08:54:18.698811" level=info msg="Found FUSE Device. Starting iRODS FUSE Lite." function=parentMain package=main
time="2022-08-04 08:54:18.699080" level=info msg="Running the process in the background mode" function=parentRun package=main
time="2022-08-04 08:54:18.699544" level=info msg="Process id = 27145" function=parentRun package=main
time="2022-08-04 08:54:18.699572" level=info msg="Sending configuration data" function=parentRun package=main
time="2022-08-04 08:54:18.699730" level=info msg="Successfully sent configuration data to background process" function=parentRun package=main
time="2022-08-04 08:54:18.922490" level=info msg="Successfully started background process" function=parentRun package=main
To unmount it, run
fusermount -u ~/IRODS
You can work with Fuse as an ordinary directory (ls, cd, cp, mv, etc.).
iCommands
ssh some_user@karolina.it4i.cz
[some_use@login4.karolina ~]$ ml irodsfs
irodsfs configuration file has been created at /home/dvo0012/.irods/config.yml.
      to start irods fs run: irodsfs -config ~/.irods/config.yml ~/IRODS

iCommands environment file has been created at /home/$USER/.irods/irods_environment.json.
      to start iCommands run: iinit

[some_user@login4.karolina ~]$ iinit
Enter your current PAM password:
[some_use@login4.karolina ~]$ ils
/IT4I/home/some_user:
  test.1
  test.2
  test.3
  test.4
Use the command iput for upload, iget for download, or ihelp for help.
Access to iRODS Collection From Other Resource
Note
This guide assumes you are uploading your data from your local PC/VM.
Use the password from AAI.
You Need a Client to Connect to iRODS Server
There are many iRODS clients, but we recommend the following:
- Cyberduck - Windows/Mac, GUI
- Fuse (irodsfs lite) - Linux, CLI
- iCommands - Linux, CLI.
For access, set PAM passwords at AAI.
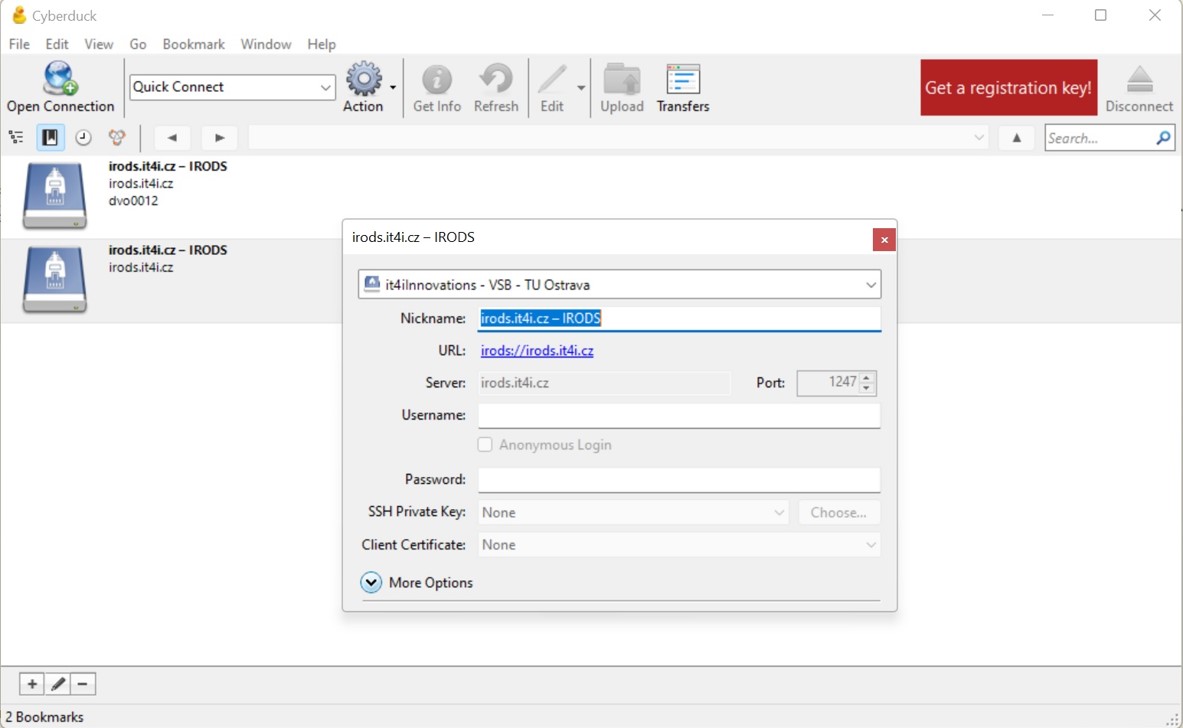
Cyberduck
- Download Cyberduck.
- Download connection profile for IT4I iRods server.
- Left double-click this file to open connection.
Fuse
Linux client only
This is a Linux client only, basic knowledge of the command line is necessary.
Fuse allows you to work with your iRODS collection like an ordinary directory.
cd ~
wget https://github.com/cyverse/irodsfs/releases/download/v0.7.6/irodsfs_amd64_linux_v0.7.6.tar
tar -xvf ~/irodsfs_amd64_linux_v0.7.6.tar
mkdir ~/IRODS ~/.irods/ && cd "$_" && wget https://docs.it4i.cz/config.yml
wget https://pki.cesnet.cz/_media/certs/chain_geant_ov_rsa_ca_4_full.pem -P ~/.irods/
Edit ~/.irods/config.yml with username from AAI.
Mounting Your Collection
[some_user@local_pc ~]$ ./irodsfs -config ~/.irods/config.yml ~/IRODS
time="2022-07-29 09:51:11.720831" level=info msg="Logging to /tmp/irodsfs_cbhp2rucso0ef0s7dtl0.log" function=processArguments package=main
Password:

time="2022-07-29 09:51:17.691988" level=info msg="Found FUSE Device. Starting iRODS FUSE Lite." function=parentMain package=main
time="2022-07-29 09:51:17.692683" level=info msg="Running the process in the background mode" function=parentRun package=main
time="2022-07-29 09:51:17.693381" level=info msg="Process id = 74772" function=parentRun package=main
time="2022-07-29 09:51:17.693421" level=info msg="Sending configuration data" function=parentRun package=main
time="2022-07-29 09:51:17.693772" level=info msg="Successfully sent configuration data to background process" function=parentRun package=main
time="2022-07-29 09:51:18.008166" level=info msg="Successfully started background process" function=parentRun package=main
Putting Your Data to iRODS
[some_use@local_pc ~]$ cp test1G.txt ~/IRODS
It works as ordinary file system
[some_user@local_pc ~]$ ls -la ~/IRODS
total 0
-rwx------ 1 some_user some_user 1073741824 Nov  4  2021 test1G.txt
Unmounting Your Collection
To stop/unmount your collection, use:
[some_user@local_pc ~]$ fusermount -u ~/IRODS
iCommands
Linux client only
This is a Linux client only, basic knowledge of the command line is necessary.
We recommend Centos7, Ubuntu 20 is optional.
Steps for Ubuntu 20
LSB_RELEASE="bionic"
wget -qO - https://packages.irods.org/irods-signing-key.asc | sudo apt-key add -
echo "deb [arch=amd64] https://packages.irods.org/apt/ ${LSB_RELEASE}  main" \
>   | sudo tee /etc/apt/sources.list.d/renci-irods.list
deb [arch=amd64] https://packages.irods.org/apt/ bionic  main

sudo apt-get update
apt-cache search irods
wget -c \
  http://security.ubuntu.com/ubuntu/pool/main/p/python-urllib3/python-urllib3_1.22-1ubuntu0.18.04.2_all.deb \
  http://security.ubuntu.com/ubuntu/pool/main/r/requests/python-requests_2.18.4-2ubuntu0.1_all.deb \
  http://security.ubuntu.com/ubuntu/pool/main/o/openssl1.0/libssl1.0.0_1.0.2n-1ubuntu5.10_amd64.deb
sudo apt install \
  ./python-urllib3_1.22-1ubuntu0.18.04.2_all.deb \
  ./python-requests_2.18.4-2ubuntu0.1_all.deb \
  ./libssl1.0.0_1.0.2n-1ubuntu5.6_amd64.deb
sudo rm -rf \
  ./python-urllib3_1.22-1ubuntu0.18.04.2_all.deb \
  ./python-requests_2.18.4-2ubuntu0.1_all.deb \
  ./libssl1.0.0_1.0.2n-1ubuntu5.6_amd64.deb
sudo apt install -y irods-icommands
mkdir ~/.irods/ && cd "$_" && wget https://docs.it4i.cz/irods_environment.json
wget https://pki.cesnet.cz/_media/certs/chain_geant_ov_rsa_ca_4_full.pem -P ~/.irods
sed -i 's,~,'"$HOME"',g' ~/.irods/irods_environment.json
Steps for Centos
sudo rpm --import https://packages.irods.org/irods-signing-key.asc
sudo wget -qO - https://packages.irods.org/renci-irods.yum.repo | sudo tee /etc/yum.repos.d/renci-irods.yum.repo
sudo yum install epel-release -y
sudo yum install python-psutil python-jsonschema
sudo yum install irods-icommands
mkdir ~/.irods/ && cd "$_" && wget https://docs.it4i.cz/irods_environment.json
wget https://pki.cesnet.cz/_media/certs/chain_geant_ov_rsa_ca_4_full.pem -P ~/.irods
sed -i 's,~,'"$HOME"',g' ~/.irods/irods_environment.json
Edit irods_user_name in ~/.irods/irods_environment.json with the username from AAI.
[some_user@local_pc ~]$ pwd
/some_user/.irods

[some_user@local_pc ~]$  ls -la
total 16
drwx------. 2 some_user some_user 136 Sep 29 08:53 .
dr-xr-x---. 6 some_user some_user 206 Sep 29 08:53 ..
-rw-r--r--. 1 some_user some_user 253 Sep 29 08:14 irods_environment.json
How to Start:
step 1:
[some_user@local_pc ~]$ iinit
Enter your current PAM password:

[some_user@local_pc ~]$ ils
/IT4I/home/some_user:
  file.jpg
How to put your data to iRODS
[some_user@local_pc ~]$ iput cesnet.crt
[some_user@local_pc ~]$ ils
/IT4I/home/some_user:
  cesnet.crt
How to download data
[some_user@local_pc ~]$ iget cesnet.crt
ls -la ~
-rw-r--r--. 1 some_user some_user 1464 Jul 20 13:44 cesnet.crt
For more commands, use the ihelp command.
PID Services
You, as user, may want to index your datasets and allocate some PIDs - Persistent Identifiers for them. We host pid system by hdl-surfsara (https://it4i-handle.it4i.cz), wich is conected to https://hdl.handle.net, and you are able to create your own PID by calling some of irule.
How to Create PID
Pids are created by calling irule, you have to create at your $HOME or everewhere you want,
but you have to specify the path correctly.
Rules for pid operations have always .r suffix.
It can by done only through iCommands.
Example of a rule for PID creating only:
user in ~ λ pwd
/home/user

user in ~ λ ils
/IT4I/home/user:
  C- /IT4I/home/dvo0012/Collection_A

user in ~ λ ls -l | grep pid
-rw-r--r--  1 user user      249 Sep 30 10:55 create_pid.r

user in ~ λ cat create_pid.r
PID_DO_reg {
      EUDATCreatePID(*parent_pid, *source, *ror, *fio, *fixed, *newPID);
      writeLine("stdout","PID: *newPID");
}
INPUT *source="/IT4I/home/user/Collection_A",*parent_pid="None",*ror="None",*fio="None",*fixed="true"
OUTPUT ruleExecOut

user in ~ λ irule -F create_pid.r
PID: 21.12149/f3b9b1a5-7b4d-4fff-bfb7-826676f6fe14
After creation, your PID is searchable worldwide:
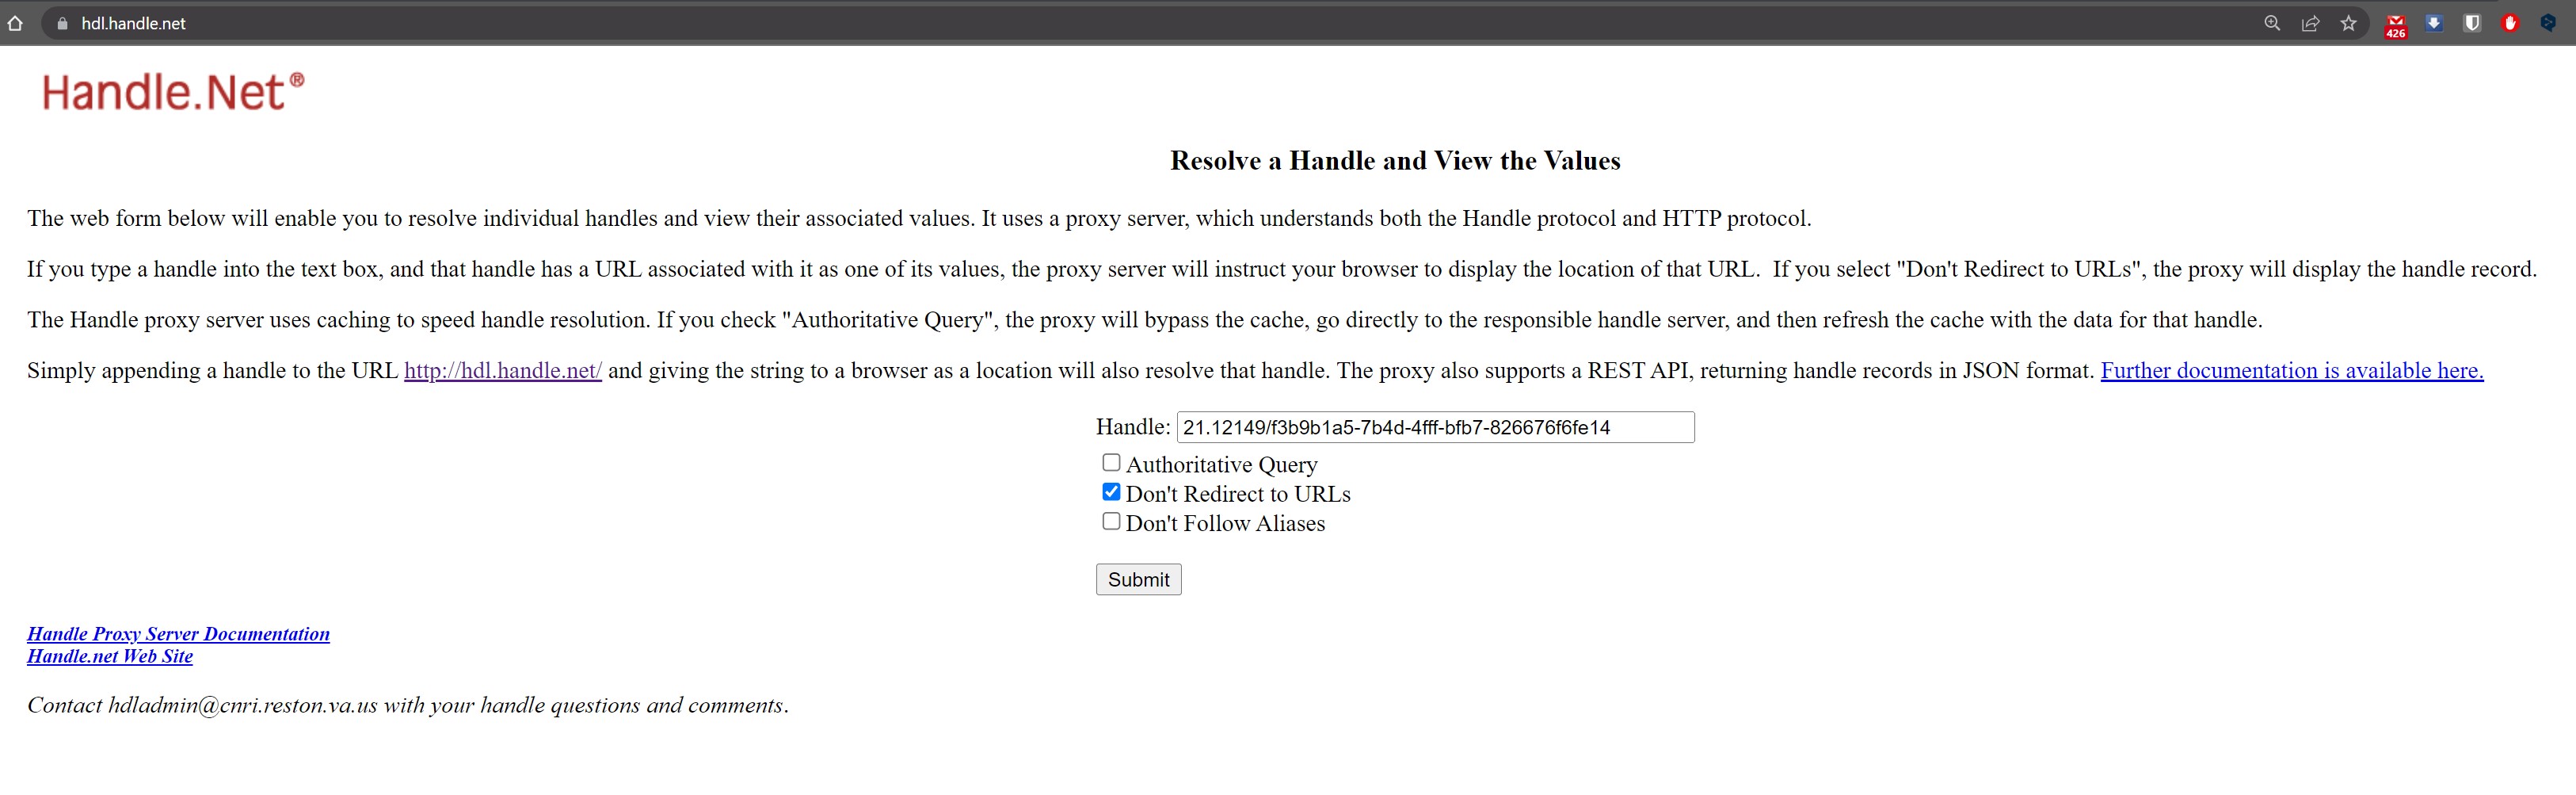

More info at www.eudat.eu
Metadata
For adding metadata to you collection/dataset, you can use imeta from iCommands.
This is after PID creation:
user in ~ λ imeta ls -C /IT4I/home/user/Collection_A
AVUs defined for collection /IT4I/home/user/Collection_A:
attribute: EUDAT/FIXED_CONTENT
value: True
units:
----
attribute: PID
value: 21.12149/f3b9b1a5-7b4d-4fff-bfb7-826676f6fe14
units:
For adding any other metadata you can use:
user in ~ λ imeta add -C /IT4I/home/user/Collection_A EUDAT_B2SHARE_TITLE Some_Title

user in ~ λ imeta ls -C /IT4I/home/user/Collection_A
AVUs defined for collection /IT4I/home/user/Collection_A:
attribute: EUDAT/FIXED_CONTENT
value: True
units:
----
attribute: PID
value: 21.12149/f3b9b1a5-7b4d-4fff-bfb7-826676f6fe14
units:
----
attribute: EUDAT_B2SHARE_TITLE
value: Some_Title
units: